Monday, November 15, 2010

Butternut Squash Bisque

tasty soup
We got a huge butternut squash in our CSA box last week and although I usually don't like squash, a yummy butternut squash soup stuck with me since I first tasted it. So we decided to put the monster to good use and make a big pot o' soup.

We started with a recipe from allrecipes.com and tweaked a bit for our supplies.

Estimated Prep time: 20 minutes of chopping
Estimated total time: about an hour
Serves: 9 (1.5 C servings)

For this recipe, you'll need:
  • A big butternut Squash (8-9 cups of cubed fleshy bits)
  • 2 Tbsp vegetable oil
  • 2 Tbsp butter
  • 1 medium onion, diced (1C)
  • 3 large carrots, diced (1.5C)
  • 6 C vegetable stock
  • 2 tsp pepper (more or less to taste)
  • 0.5 tsp Salt (more or less to taste)
  • 1-3 tsp ground nutmeg (more or less to taste)
  • 0.5 C heavy cream


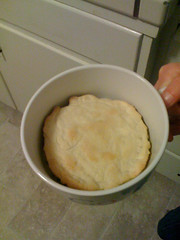
(Time: 0:00) Peel and chop stuff: dice the onion and carrots (but keep them separate). Peel the squash, exposing the dark orange inner flesh. Halve the peeled squash and scoop out and discard the seeds and stringy matter inside. Chop into half-inch cubes.
Peeling the Squash
Cubed Squash

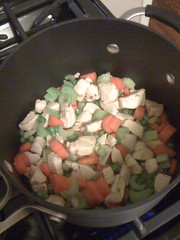
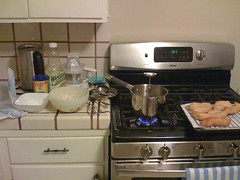
(Time: 0:10) Heat the oil and butter in a large stock pot. Gently saute the diced onions until golden and tender. Add carrots and stir until mixed.

Golden brown onions and carrots

(Time: 0:20) Add squash cubes to the pot. Stir in the vegetable stock (we used 4 C stock and 2 C broth from bullion, and it tasted yummy).
 

(Time: 0:22) Add salt, pepper and nutmeg to taste. Bring to a boil, then reduce heat and simmer until vegetables are tender (about 10-15 minutes).

Some nutmeg

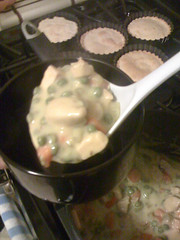
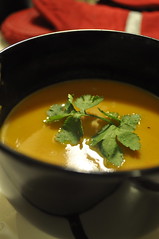
(Time: 0:37) Stick an immersion blender into the pot and let 'er rip. Blend until smooth and creamy. If you don't have one of these magic sticks, a food processor or blender works well to blend the soup.

(Time: 0:50) Add half a cup of cream and stir gently until fully incorporated, and enjoy immediately!
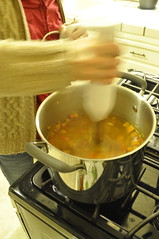

will it blend?

Tuesday, March 9, 2010

Baked goodies -- Challah


Here's some Challah I made a few months ago. I'll be posting photos of some of the things that make it out of my kitchen every week (when I remember to pull my camera out.) Enjoy!

Monday, March 8, 2010

Chicken Bowl-Pies

One of my favorite comfort foods is chicken pot-pie, and I've been working out a good filling recipe, but find myself lazy when it comes to making the crust.  This "bowl-pie" is a variation on the assembly of a standard pot-pie that is good for the lazy or the hurried... it takes about an hour to prepare.

Finished pot pie


For this recipe, you'll need:
  • 2 small chicken breasts
  • 2 carrots
  • 2 stalks celery
  • 1 cup frozen peas
  • 0.25 tsp cumin
  • 1 bay leaf
  • 0.5 tsp garlic salt
  • 0.25 tsp adobo seasoning
  • 1 10.75 oz can condensed cream of chicken soup
(Time: 0:00) Heat a tablespoon of cooking oil on medium-high in a 4-quart pot.  Dice the chicken into about 0.75-inch pieces, and toss into the hot oil along with the garlic salt and adobo seasoning, stirring frequently.  While this is sizzling, take the pie crust out of the fridge and let it warm up on the counter as you continue working on the filling base.


(Time: 0:15) When the chicken is mostly cooked through, add 1 cup of water, the bay leaf and the cumin.  Cover and slowly bring to a boil.  (You want to keep all the yummy evaporating juices in the pot to make a broth.) If your oven takes more than 10 minutes to pre-heat to 450°F,  you might want to start it now.

As you're waiting for the water to boil, chop the carrots and celery, then add them to the pot. 

Base

(Time: 0:20) Once the pot comes to a boil (with all the veggies added), reduce heat to medium, cover and simmer until the carrots are tender, or about 5-10 minutes, while you prepare the crust.


Prefab pie crust

Crust cookies

Crustlet

(Time: 0:30) Unroll the pie crust onto a cutting board,

and use the pastry tins to cut pieces of dough roughly the size of the bottom of the pastry tins. 

This can be estimated, since the shapes will adjust in the oven.  Shove the cut-outs into the bottom of the tins

... and stick them into the fridge so they can rest and cool down.  While they're resting (about 10 minutes works best, but they're flexible), pre-heat the oven to 450°F. 

(Time: 0:40)
When the oven is ready, take the tart tins out of the fridge and slide them onto the middle rack in the oven.  Bake for about 10 minutes until golden brown.


Filling

(Time: 0:41) While the crusts are baking, it's time to put the finishing touches on the filling.  Take the lid off and let the condensation drip back into the pot of boiling soup.  Dig out the bay leaf and throw it away.  Add the condensed cream of chicken soup, and stir vigorously until the soup is fully incorporated.  Put the cover back on the pot, and bring back to a very light boil. 
(Time: 0:45) When the filling returns to a boil, stir, reduce heat to low, and let simmer until you're ready to serve it.

(Time: 0:50) Take the crusts out of the oven and let them cool for 5 minutes.


(Time: 0:55) Spoon some filling into a bowl that's conveniently slightly larger than the tart pans. 

Spooning into bowl

Put one of the crusts on top and enjoy your Chicken Bowl Pie!

Tuesday, March 2, 2010

Fish & Chips

We just made the fish part and cheated on the chips (bought some frozen pre-made ones).  Maybe we'll do the chips too next time.

This is more-or-less the fish part of the Alton Brown recipe from foodnetwork.com.  We scaled it down and modified it a bit to work with the 1.0lbs of cod we had.


Fish & chips

You'll need:
  • 1lb Fresh Cod Fillets
  • 1.5 C Flour
  • 0.75 t Sea Salt
  • 0.25 t Cayenne Pepper
  • 0.25 t Black Pepper
  • 2 t Baking Powder
  • 0.2 C Corn Starch
  • 10 oz Brown Beer
  • 1 Quart of frying oil
In a medium mixing bowl, whisk together flour, baking powder, salt, cayenne and black pepper. When combined, whisk in about 10 oz of brown beer.  Mix until smooth.  Let rest in the refrigerator for at least 15 minutes. Heat a quart of cooking oil to 350°F in a deep medium saucepan.

While the oil is heating, cut 1lb of cod into about 1 1/2 oz strips.
Cod

Dredging

When the oil is hot, dredge the cod in corn starch, shaking off any excess. 

Submerge the starchy fish sticks into the batter one at a time, allowing excess batter to drip off before dropping into the hot oil.
Dipping

Frying

Once the fish is in the oil, allow the batter to set, then flip intermittently to evenly fry each side (the fish will probably float if you have enough oil).  Fry the fish in small batches, making sure to re-heat the oil to 350 between each batch. 

This is what our assembly line looked like.

Assembly line

Drying
When it is a golden brown color (about 5-6 minutes), remove it from the oil and put it on a drying rack to drip.  Eat as soon as possible, or keep in a warm dry oven so the batter stays crispy.